How to customize your email
Brightspeed High-Speed Internet accounts include up to 10 email addresses for you and members of your household.
Jump to the sections below for instructions on how to customize your inbox:
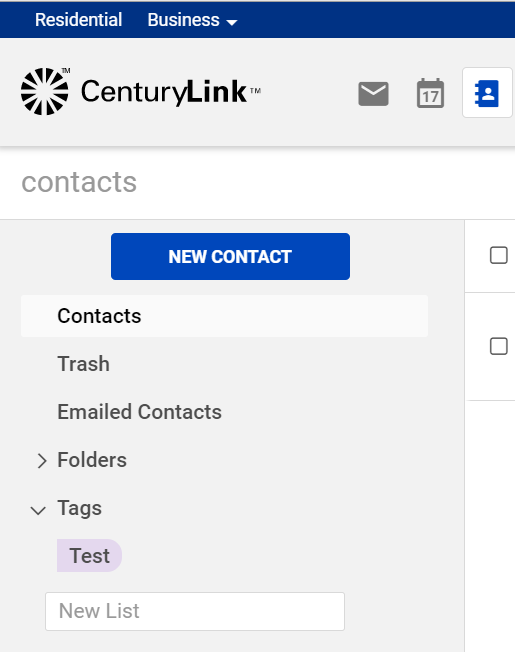
Find your contacts
Contacts can be found in the Modern webmail version by clicking on the address book icon at the top left of your screen.
You will see a list of all contacts, as well as people you have sent emails to.
You can create contact lists:
- Enter the name of your list in the box at the bottom of the contacts menu.
- Select the contacts to add to the list and click "Assign to Lists."
- Select the list you want the contacts added to.
Mark messages as spam
- Select the message in your inbox.
- On the toolbar, select Spam.
- You can also right-click the message and select "Mark as Spam."
- The email is moved to your junk folder.
Note: Marking a message as spam does not prevent the sender from sending you more messages. To do this, you'll want to block the sender.
Mark messages as NOT spam
Sometimes messages that are not junk are placed in the junk folder. You can move the messages to the appropriate folder by dragging it or right-click the message and select "Mark as Not Spam." The message will then be moved to your inbox.
Block or allow specific addresses
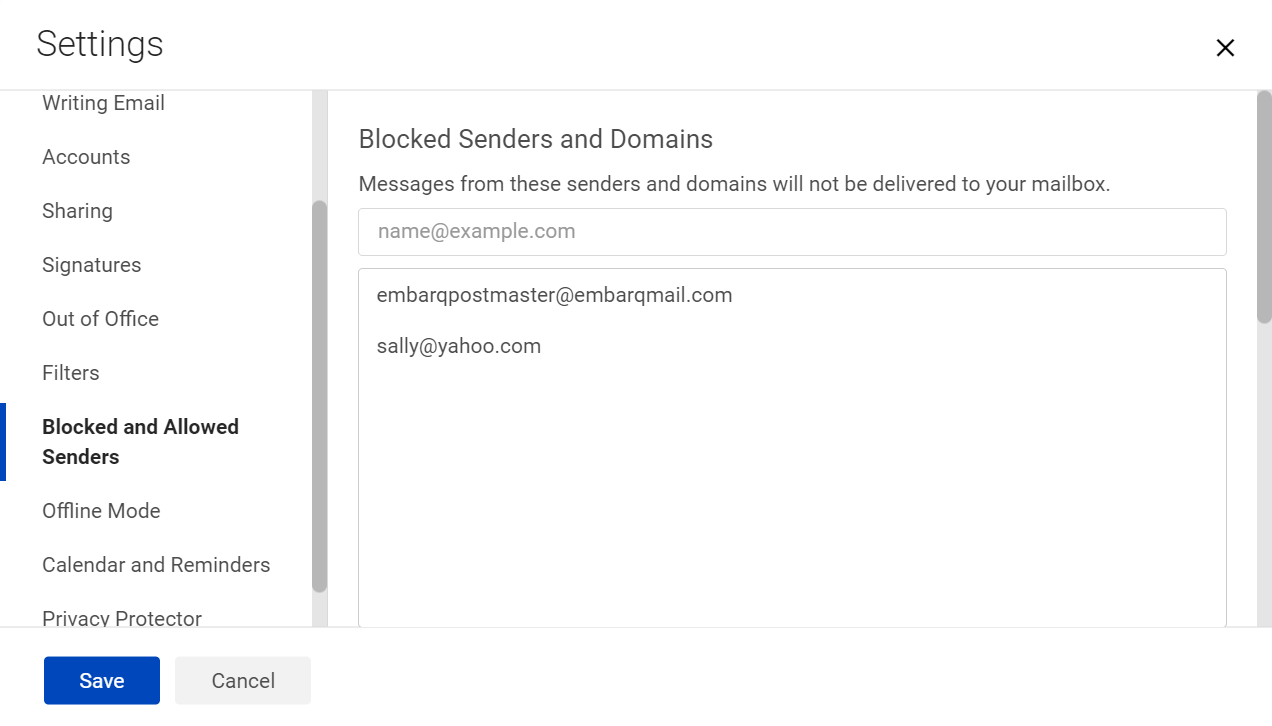
If you notice that certain email addresses are always being incorrectly delivered to either your inbox or junk folder, you can flag those addresses to be blocked or allowed.
- Go to Settings > Blocked and Allowed Senders.
- To block an address, copy and paste or type it into the text box under the "Blocked Senders and Domains" heading.
- To allow an address, copy and paste or type it into the text box under the "Allowed Senders and Domains" heading (not shown in the image below; scroll down on the Settings screen).
- Click Save.
Create filters
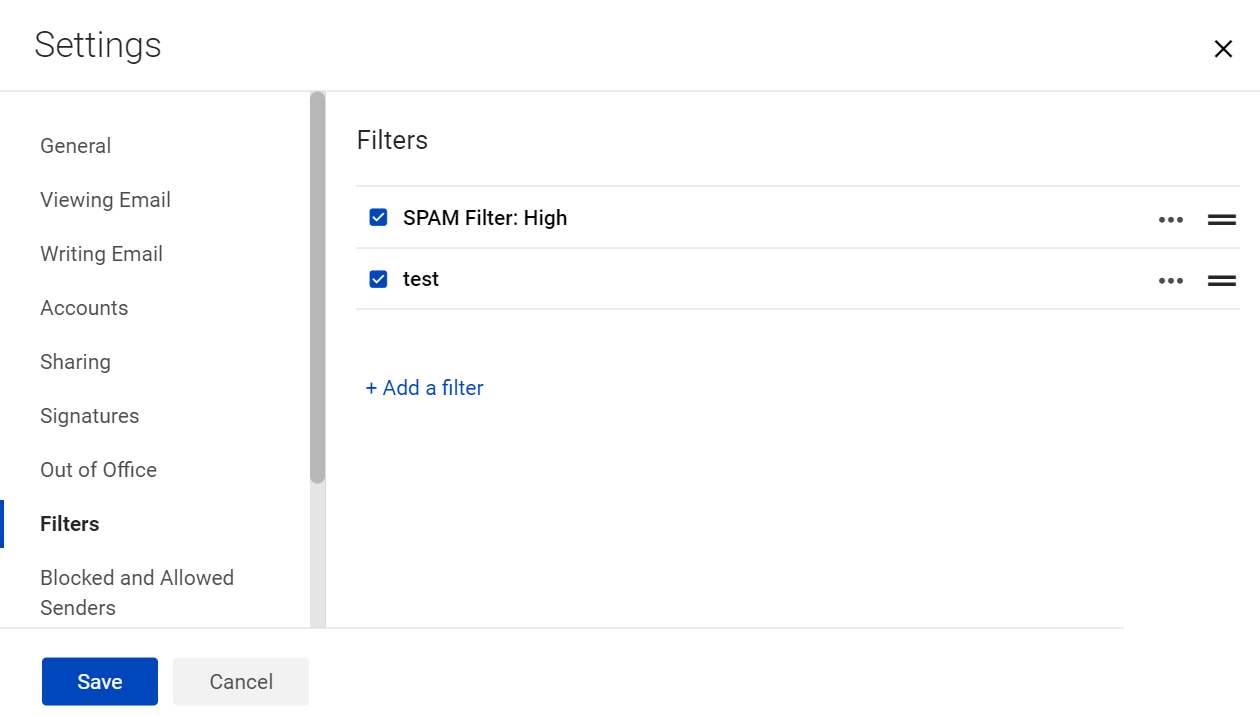
You can create filters for messages based on the sender address, subject line, and more.
- Click the gear icon in the upper right of your screen.
- Click on Settings.
- Click on Filters from the menu on the left.
- Click the blue "+ Add Filter" option at the bottom of the window and create your filter.
You can select any filter to view its details. Click on the three dots to see options to edit or delete the filter.
You can create filters to do the following:
Sort incoming messages into folders. For example, all email messages from your bank are automatically moved into your "banking" folder.
Tag messages. For example, email messages from Facebook-events mailing list are marked with the Events tag.
Forward or discard email. For example, all email messages received from a particular email address are moved to the Trash folder.
Flag messages for importance.
Auto-forward messages
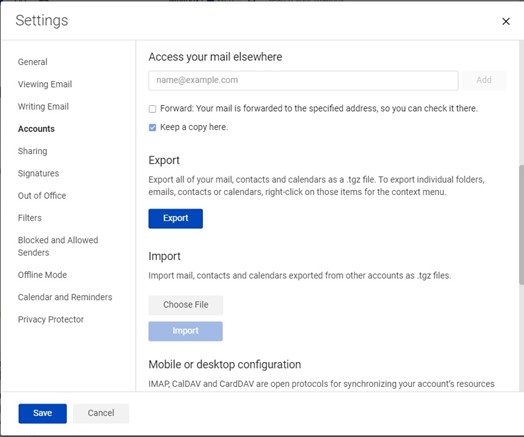
You can choose to have messages from your email account automatically forwarded to another address.
- Click the gear icon in the upper right of your screen.
- Click on Settings.
- Click on Accounts from the menu on the left
- Scroll down to find the option to "Access your email elsewhere."
- Enter the address you'd like to have messages sent to.
- If you don't click the box to Keep a copy here, you won't see those messages in your inbox.
Customize your inbox view settings
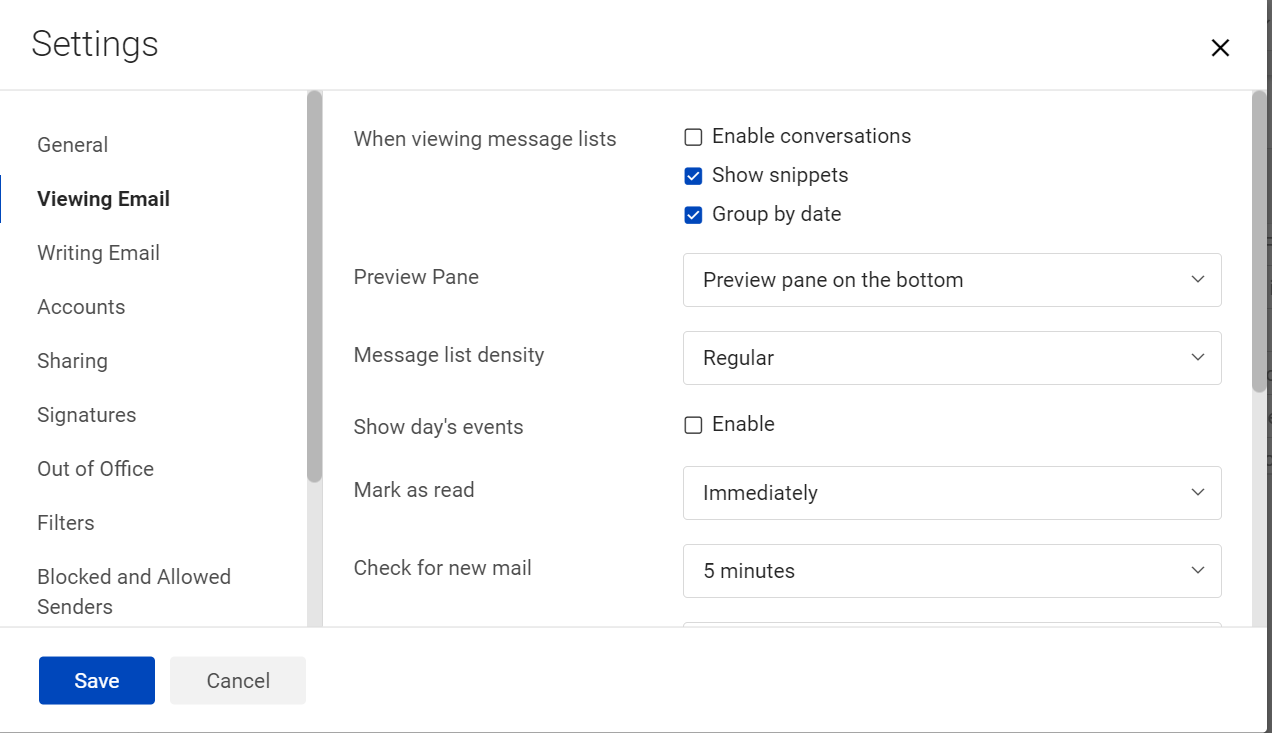
To change your inbox view options, click on the gear icon in the upper right of the screen, next to your name. Then click Settings and select Viewing Email. Change your settings and click Save.
You can customize any of these settings:
- View messages by conversation
- View snippets of messages
- Group messages by date
- Location of the Preview Pane
- Message density
- When to mark messages as read
- When to check for new messages
- Read receipts
- New mail notifications
- Show images in emails
- View emails as plain text
- Show images by default from a self-selected list of trusted senders
Adjust Privacy Protector
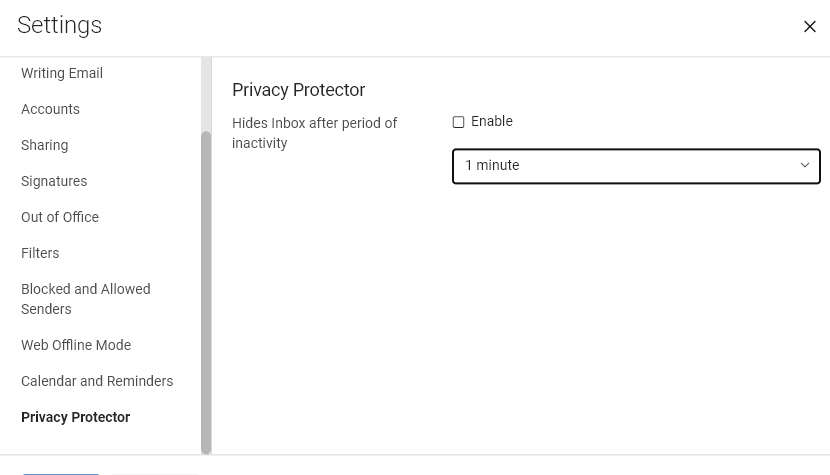
The Privacy Protector is an overlay window that appears on your inbox and reading pane with displays of local goods and services, following a period of inactivity. After a few minutes, the window will display over your webmail and inbox, providing an extra layer of privacy. Simply click "continue" to hide the overlay and access your email and inbox again.
You can adjust the inactivity time before Privacy Protector turns on, or you can turn it off entirely.
- Click on the gear icon at the top right of your screen.
- Select Settings.
- Select Privacy Protector to see options for inactivity time, or you can click or unclick the "Enable" box to turn it on and off.
Add a personalized signature
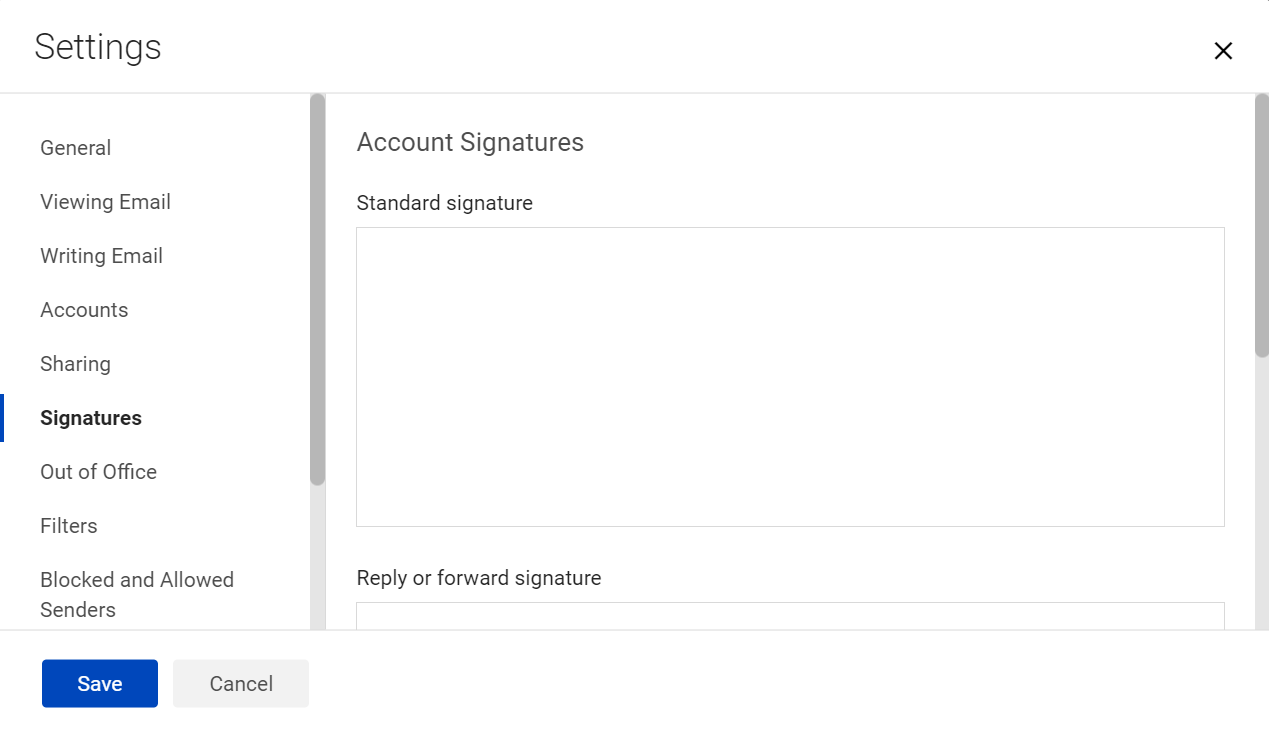
You can automatically add a signature to your outgoing emails, so you don't have to copy or type it every time. You can create a standard signature and a signature for replies and forwards. You can also create signatures for multiple accounts.
To add a signature:
- Click on the gear icon in the upper right of the screen, next to your name.
- Click on Settings.
- Click on Signatures.
- Enter your signature(s).
- Click the Save button at the bottom.
Change the text size
The easiest way to change the font size in most browsers is to hold down the Ctrl key while pressing the plus (+) key to enlarge text, or the minus/hyphen (-) key to reduce text. You can continue to press either of the two keys to adjust the text size to your liking.
Or, if you have a mouse with a wheel you may be able to zoom in and out on your browser by holding down the Ctrl while rolling the mouse wheel up or down.
Switch back to Classic version
If you prefer the look and functionality of the Classic webmail, you can still use it — either for one session or permanently.
Option 1: Temporary webmail version change
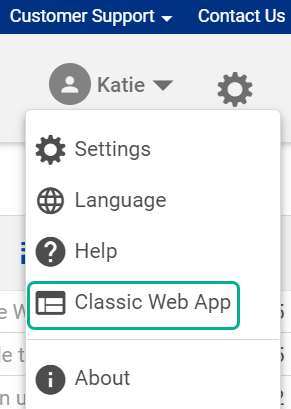
- Click on the gear icon at the top right of your screen, next to your name.
- Choose Classic Web App (circled in green in this image) at the bottom of the menu to use that version until you sign out.
Option 2: Permanent webmail version change
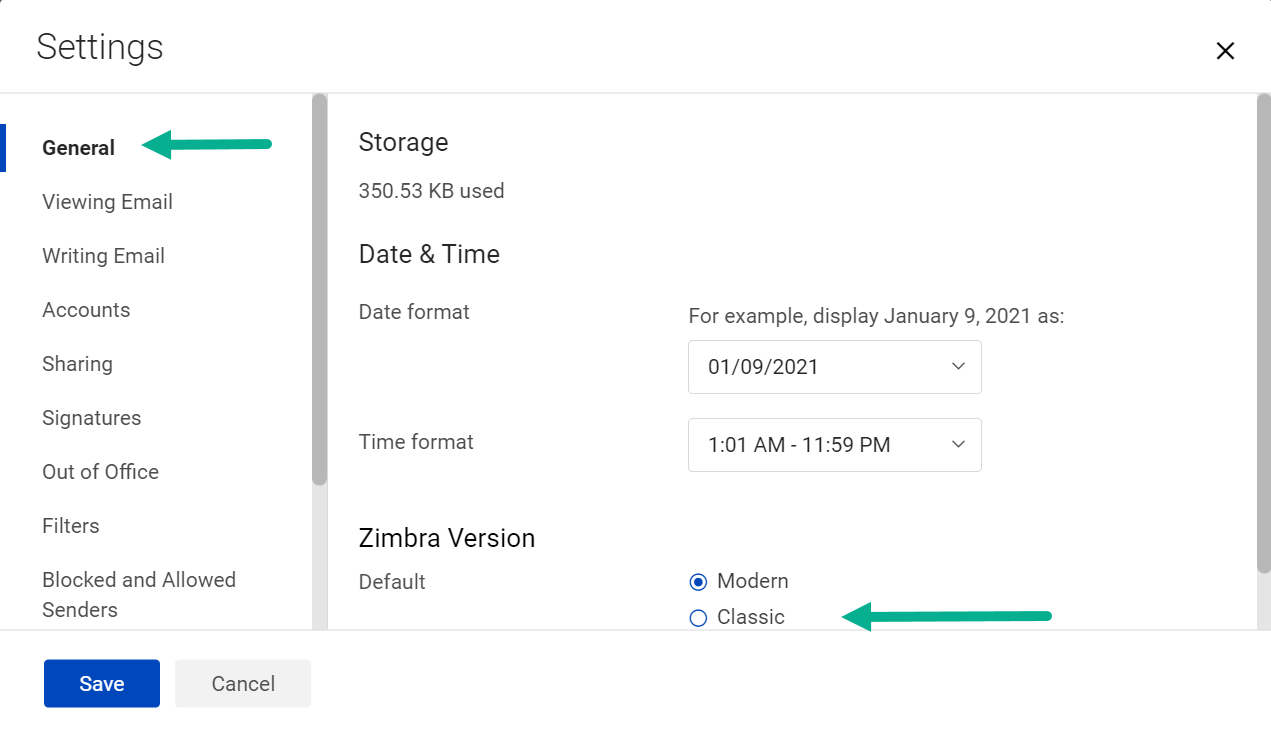
- Select the gear icon and then select Settings.
- Look for "Zimbra Version" at the bottom of the window.
- Select "Classic" and it will be set as your default version, so it will appear every time you use your webmail.
Sign in to your email
Visit your personal home page to check your email, browse the news, check the weather and more.
Keep your email active
Like many free web-based email services, unused email accounts are deactivated after a certain amount of time. To keep your email active, be sure to log in at least once a year. Accounts with no activity for more than a year will be deactivated and all contents deleted.
Top email topics
Top tools
Log in to access our most popular tools.
Was this page helpful?
Brightspeed services support

.png)


.png)


