How to change your WiFi security settings
Your WiFi network name (SSID) and password (key) are used when you connect your devices to WiFi. Customizing the network name can make it easier to identify your WiFi network, and creating a unique password is a good way to secure your home network.
Did you know that for most modems, you can change your WiFi password through the CenturyLink app? Learn how >
Changing your WiFi name and password through the modem settings
Start by logging in to your modem's user interface, then select the Wireless Settings menu:
NOTE: Depending on your model, your modem's user interface may appear slightly different from the images below.
1. Connect a device, such as a computer or tablet, to the internet through WiFi or using an Ethernet cable connected to your modem.
2. Open a web browser and type http://192.168.0.1 into the web address field.

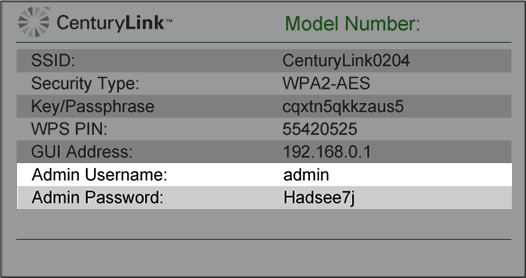
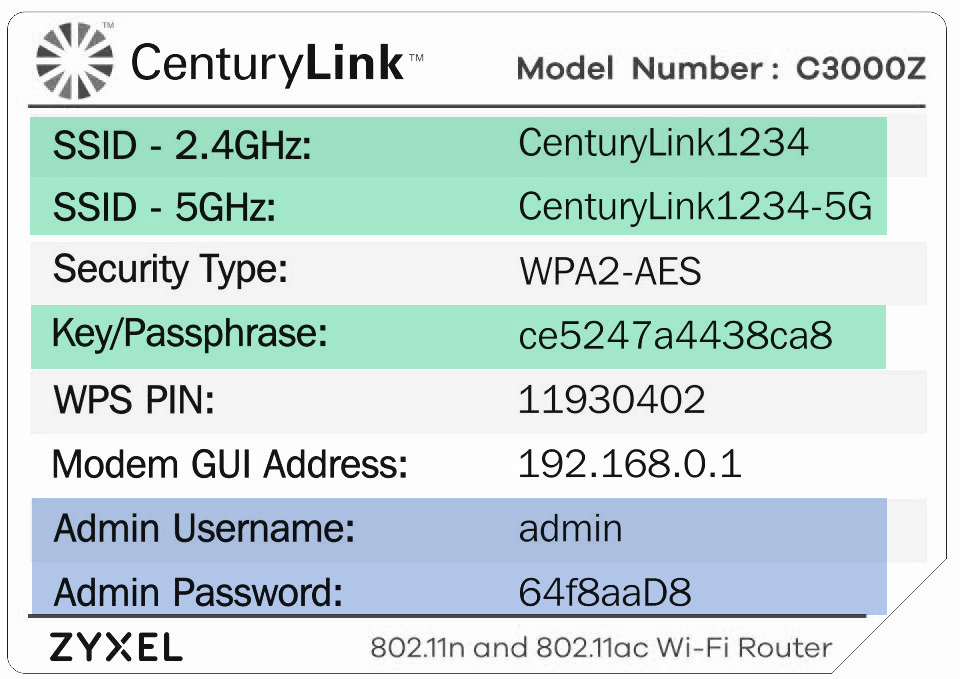
3. Log in to the modem's settings interface (Modem GUI) using your Admin Username and Admin Password. Note that these are different from your wireless network name (SSID) and WiFi password (security key).
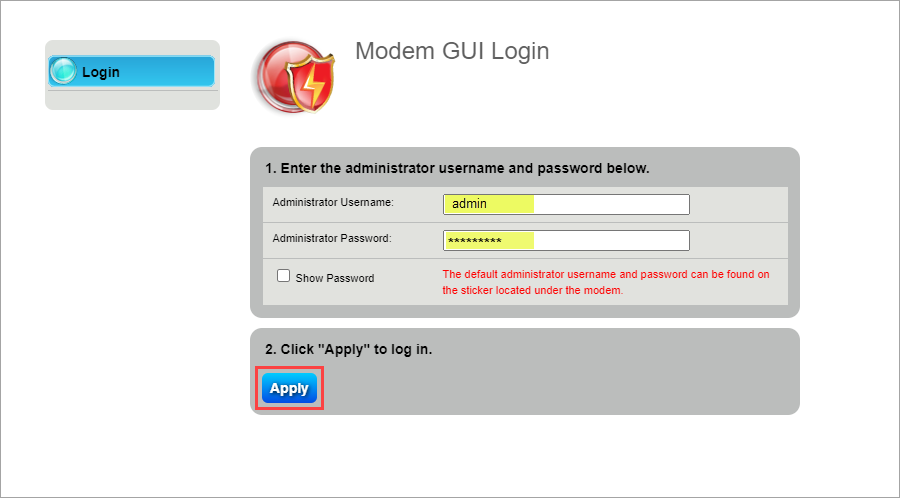
4. Select the Wireless Setup icon in the main menu.
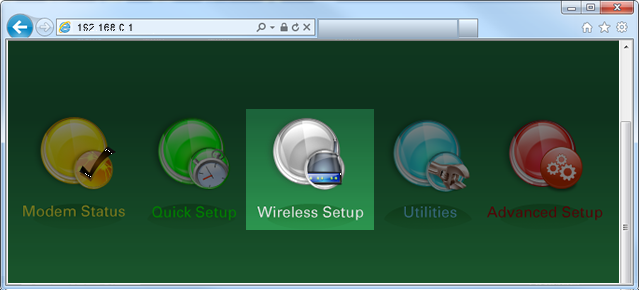
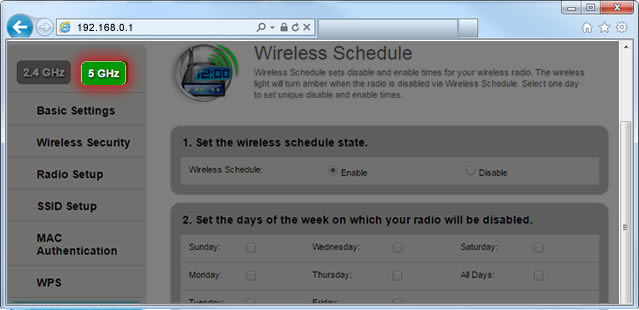
Next, open the instructions below to see how to change your SSID or password.
First access the wireless settings as described in steps 1-4 above, then continue with step 5:
5. Select "SSID Setup."
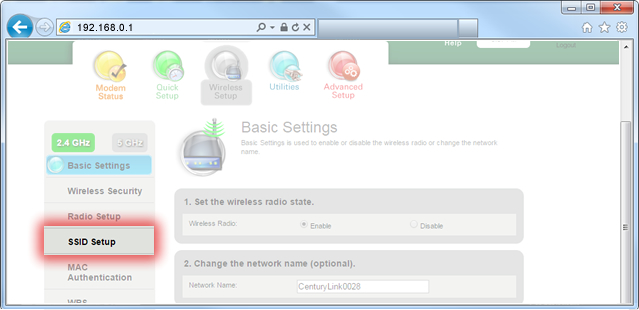
6. Select the SSID you want to change. You can find your SSID printed on your modem's label. Typically, the first one in the drop-down list is your main home network.
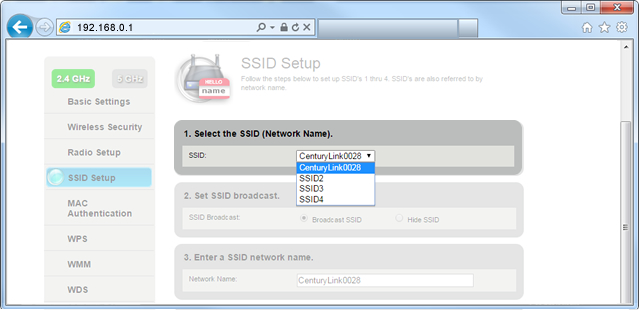
7. Select "Broadcast SSID" to make the network visible on any device within range.
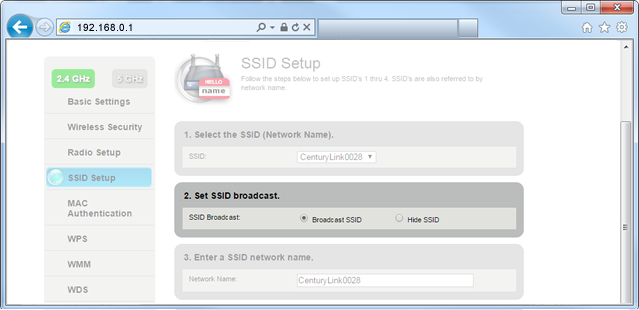
8. Enter a new network name. The SSID cannot contain spaces. Remember that this will be visible to others, so it should not contain private information or clues to your password.
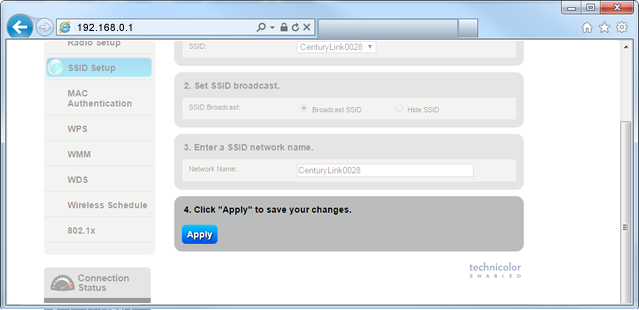
9. Select "Apply" to save your changes.
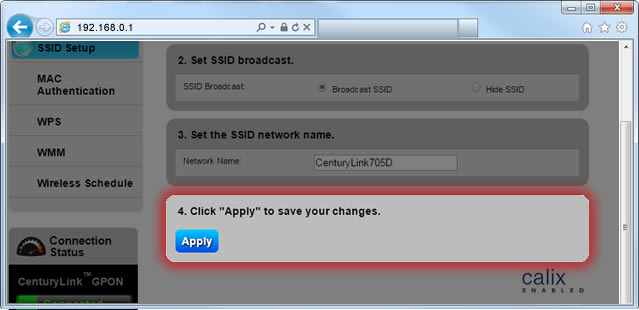
Note: For some dual-band routers, you may need to change the settings for each network one at a time. Once you get to the Wireless Setup menu, select “2.4 GHz” and then “5 GHz,” and repeat the same steps on both.
Read more: What's the difference between 2.4 and 5 GHz?
First access the wireless settings as described in steps 1-4 above, then continue with step 5:
5. Select "Wireless Security."
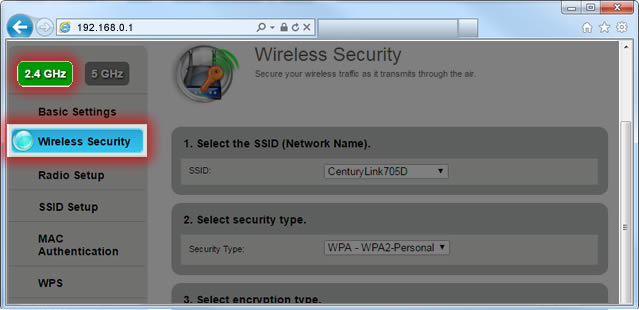
6. Select the name of your wireless network (SSID). You can find the SSID on the label on the side or bottom of the router. Typically, the first one in the drop-down list is your main home network.
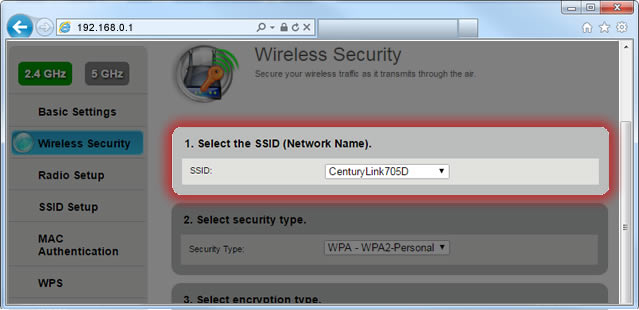
7. Select the security type shown on the equipment label. For some modems, security type may appear in the "SSID Setup" menu instead.
WEP Note: You should use the strongest encryption that is compatible with your network. WEP should only be used if your devices are NOT WPA compatible.
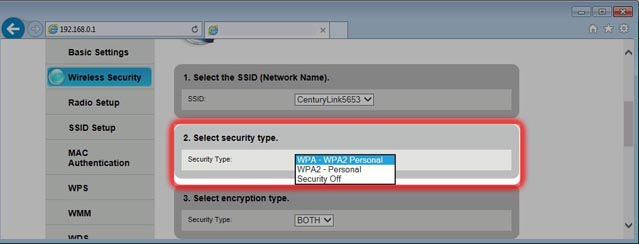
8. Select "Both" for the encryption type.
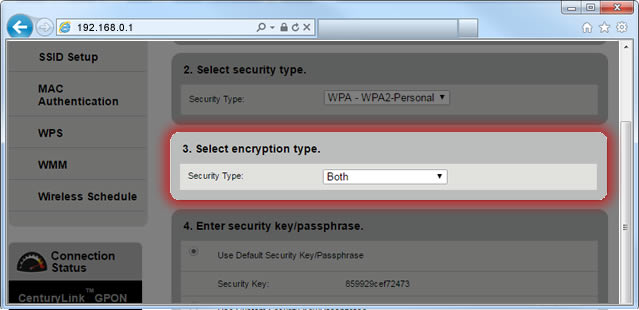
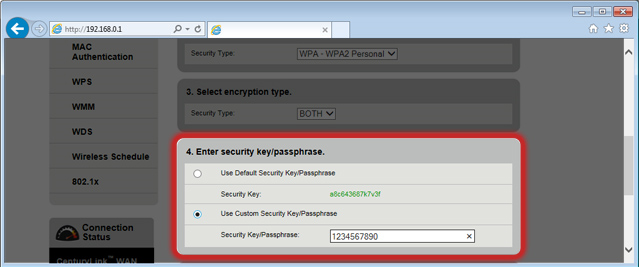
9. Select "Use Custom Security Key/Passphrase" and enter your new password in the box. You can also change this at any time back to "Use Default Security Key/Passphrase" to return the password back to the one printed on the router label.
Password tips
If you are given the option of 64 bits or 128 bits, follow these guidelines:
- 64 bits: Enter 10 characters*
- 128 bits: Enter 26 characters*
* Characters can only contain letters between A-F and numbers between 0-9 with no spaces.
In all other cases, your custom password must:
- Be between 8 and 63 characters long
- Contain at least one number from 0 to 9
- Contain at least one letter from A to Z
Note: The space character can be used (but is not required)
10. Select "Apply" to save your changes.
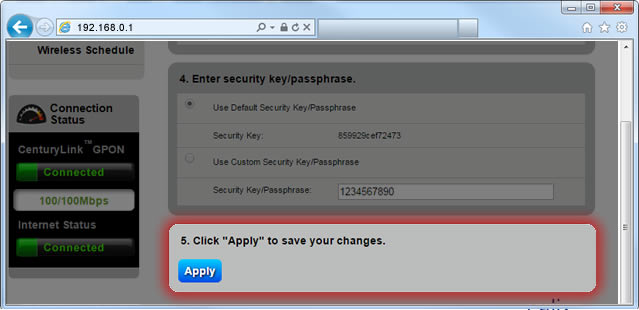
Note: For some dual-band routers, you may need to change the settings for each network one at a time. Once you get to the Wireless Setup menu, select “2.4 GHz” and then “5 GHz,” and repeat the same steps for both.
Read more: What's the difference between 2.4 and 5 GHz?
Learn more about home WiFi security
Top modem/router topics
- Set up your modem and activate internet
- Connect devices to your WiFi network
- Should you use 2.4 or 5 GHz WiFi?
- Brightspeed compatible modems
- How to read your modem lights
- When and how to use modem reset
- How to return a modem
- How to upgrade your modem's firmware
- Modem or router: What's the difference?
View all Modem/Router topics
Top tools
Log in to access our most popular tools.
Was this page helpful?
Brightspeed services support

.png)


.png)


